
As an Amazon Associate I earn from qualifying purchases.
This guide covers one job done properly: replacing the washer in a traditional compression tap, the sort you turn two or three full rotations to shut off. If your tap stops with a quarter turn of the lever, it has a ceramic cartridge inside and it has no washer to change, so this procedure will not help you.
If you are not yet sure which fault you have or which tap you are looking at, start with our guide to diagnosing a dripping tap, which works out which tap you have and which of the possible faults you are actually dealing with. Our guide to the different types of taps covers the same ground from the other direction. Come back here once you know it is the washer.
Every guide on the first page of Google gives you roughly the same five steps. What almost none of them give you are the four places people actually get stuck: the isolating valve that snaps when you force it, the tap head with no visible screw, the headgear nut that twists the whole tap off its seal, and the drip that comes back three weeks later because the problem was never the washer. Those get the space here.
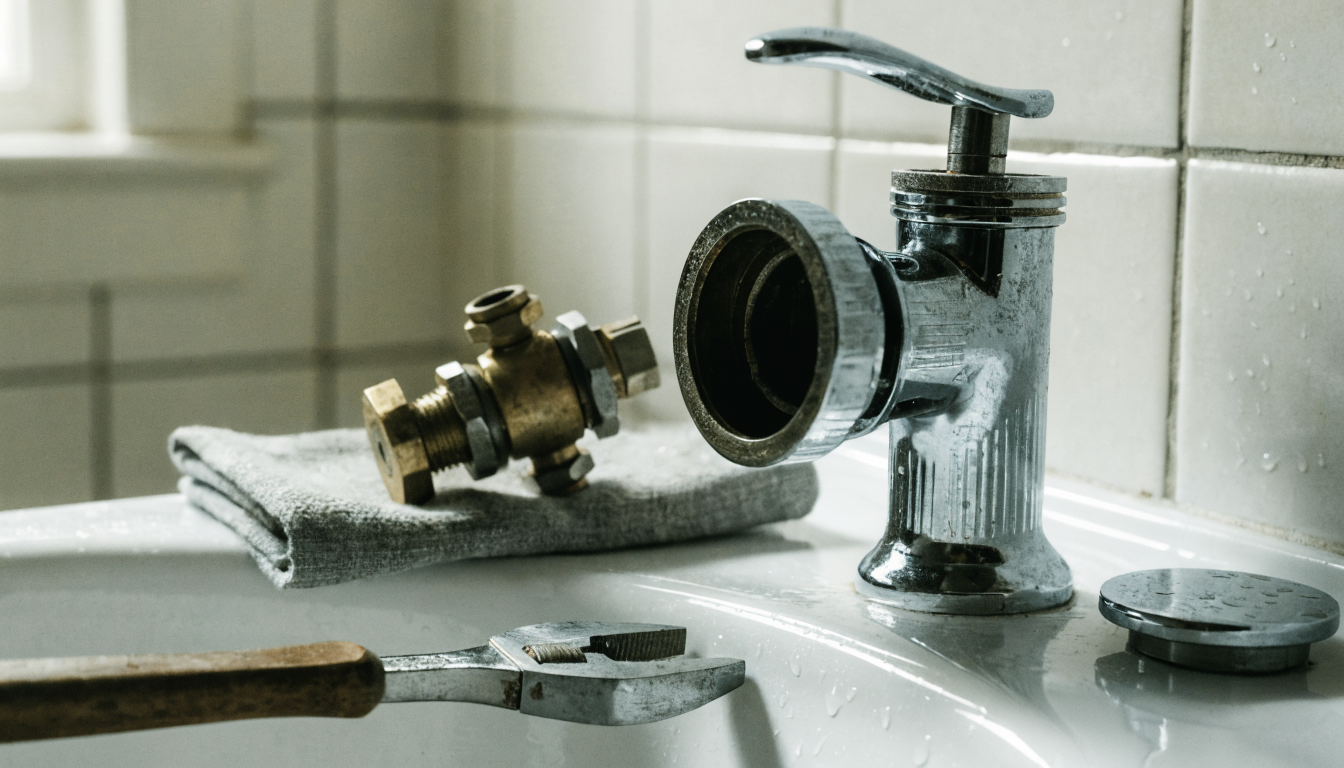
Check you have the right kind of tap before you start
There is one test and it takes two seconds. Turn the tap from fully off to fully on and count.
The same washer arrangement is used on plenty of taps that are not in a bathroom. An outside bib tap is very often a compression tap with an ordinary washer in it, and it is usually the easiest one to practise on because a drip outside is not going to damage anything while you learn.
What you actually need
This is a short list and none of it is expensive. The only item worth spending real thought on is the washers themselves, and that is covered further down.
| Item | Why you need it |
|---|---|
| Assorted tap washers | You will not know the size until the tap is in pieces and the water is off, which is the worst moment to be driving to a merchant. |
| Adjustable spanner, ideally two | One to undo the headgear nut, one to hold the tap body still while you do it. The second one is the whole difference between a fixed tap and a flood. |
| Flat and crosshead screwdrivers | A small flat one prises the index disc off. A crosshead usually undoes the screw underneath it. |
| Basin wrench | Only if you end up working under the basin on the tap tails or back nuts. Not needed for the washer itself. |
| An old towel and a cloth | The cloth goes between the spanner jaws and the chrome. Marked chrome does not unmark. |
| PTFE tape | Not part of a washer change. Worth having in the house for the day a threaded joint underneath the tap needs remaking. |
If you are building up a basic kit rather than buying for this one job, our guide to the DIY plumbing tools worth owning covers what earns its place in a cupboard and what sits unused.
Check adjustable spanners on AmazonThe job, start to finish
Steps one, four, five and seven are where it goes wrong. The rest is assembly.
Isolating the water, and the warning nobody gives you
Under most basins and sinks fitted in the last thirty years or so there is a small isolating valve on each tail, a brass or chrome fitting with a slotted screw head across it. Turn the slot so it sits across the pipe rather than along it and the water to that tap is off.
Here is what the retailer guides leave out. Those valves sit untouched for twenty years in a damp cupboard, and a fair number of them seize solid. If you put a screwdriver in and lean on it, one of three things happens: it turns, it does nothing, or the spindle shears and you now have an open valve you cannot close and no way to stop the water except the main stopcock. A ten minute job has just become an evening with the mains off.
Test the isolating valve, do not trust it
Turn it with steady, light pressure. If it moves, good. If it resists, stop pushing and use the stopcock instead. A seized valve that you leave alone costs you nothing. A seized valve that you snap costs you an emergency.
Then prove it. Open the tap. If water keeps running after a few seconds rather than trailing off to nothing, the valve has not sealed, and plenty of old valves close most of the way without closing fully.
If there is no isolating valve, or you do not trust the one there, use the main stopcock. In most UK houses it is under the kitchen sink, and the usual alternatives are a downstairs cloakroom, under the stairs, in a utility room, or in the garage near where the main comes in. Turn it clockwise to close. If you have never found yours, it is worth locating it now rather than during an emergency, and our guide on what to do when you have no running water goes through the usual hiding places.
One caveat on the stopcock. If the tap you are fixing is a hot tap fed from a cylinder and a cold tank in the loft, closing the rising main does not empty the tank, and the hot tap will keep running off stored water for a while. Open the tap and let it run itself down before you start undoing anything.
Put the plug in first
The washer is usually held on by a screw or a small nut roughly the size of a grain of rice, and it will be wet and slippery when it comes off. This is the single most common way a simple job turns into a second trip out, and it is entirely avoidable.
Put the plug in, then lay an old towel over the basin. The plug catches the screw. The towel stops a dropped spanner chipping the ceramic, which is a repair that costs a great deal more than the washer.
Getting the tap head off when there is no obvious screw
This is where most people stall, because the tap looks like a solid lump of chrome with nothing to undo. There are three arrangements and one of them will be yours.
1. The cover unscrews by hand
Common on older chrome pillar taps. Grip the chrome shroud below the handle and turn it anti-clockwise. If it will not move by hand, wrap a cloth round it and use pliers gently. Limescale is usually what is holding it.
2. A screw hides under the hot or cold index disc
The little red or blue disc on top is a cap, not a decoration. Slide a small flat screwdriver or a knife blade under its edge and prise it up. There is a screw underneath. Take it out and the handle lifts off.
3. A grub screw sits under or behind the lever
On lever handles, look underneath and around the back for a small recessed screw, often needing a small hex key rather than a screwdriver. Slacken it and the lever pulls straight up. It does not unscrew.
If the handle is on and will not lift once the screw is out, it is almost always limescale welding it to the splines rather than anything mechanical. Rock it gently side to side while pulling up. Do not lever against the basin, because you will crack it long before the handle gives.
The headgear nut, and the mistake that floods the cupboard
With the handle off you will see a hexagonal brass nut, the headgear, screwed into the top of the tap body. It comes out anti-clockwise, and on a domestic tap it is well within the range of an ordinary 200mm adjustable spanner.
Now the instruction that matters more than anything else on this page. That headgear has usually been in there for decades and it will be tight. If you put one spanner on it and heave, the force does not stop at the nut. It travels down through the tap body, through the tail, and into the back nut clamping the tap to the basin. You twist the whole tap round on its seating.
Pad both spanner jaws with a cloth. If the headgear will not move with sensible force from two spanners, stop. That is covered at the end of this guide.
The washer, the jumper, and which size you need
Lift the headgear out and turn it over. At the bottom of the spindle is a small brass disc with a stem, the jumper, and the rubber washer sits on the face of it. On some taps the jumper is captive in the headgear, on others it drops out into the tap body and you will need to fish it out, so look before you tip the tap upside down.
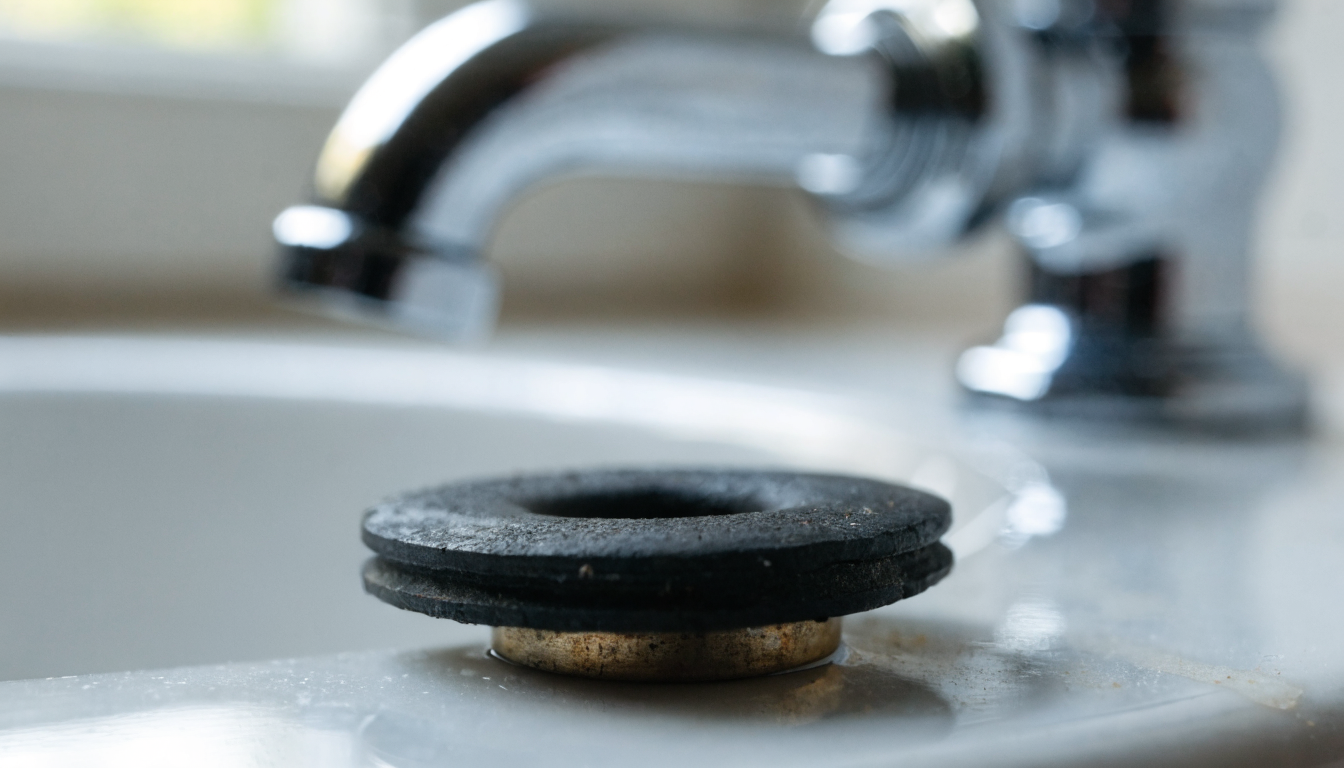
The washer is held by a small nut or screw, or on cheaper taps it simply pushes over the stem. Take the old one off and keep it, because it is your reference for the new one. A washer that has gone is obvious once it is out: hard instead of springy, with a distinct groove pressed into its face.
The two sizes that cover most UK homes
UK taps are sized by their thread, and washers are sold to match. The sizes below are how B&Q, Wickes and the merchants describe their own stock, which is the most reliable guide to what you will actually be handed if you ask at a counter.
| Washer size | Where it is normally used | Typical B&Q price |
|---|---|---|
| 1/2 inch | Basin taps and kitchen sink taps. The one you will need most often. | £2.02 single, £5.99 for a pack of 10 |
| 3/4 inch | Bath taps, and most outside taps. | £1.98 single, £5.99 for a pack of 10 |
| 3/8 inch | Some smaller and older basin taps. Less common but still sold. | £5.99 for a pack of 10 |
| Assorted pack | 3/8, 1/2 and 3/4 together. The sensible buy. | From £7.11 for 13 pieces |
Two things worth knowing before you buy a single washer in one size. First, some online listings quote the nominal thread size converted straight into millimetres, so you will see a 1/2 inch washer described as 12.7mm when the rubber itself is not that measurement at all. Second, several traditional tap patterns take their own shape of washer rather than a plain flat one, which is why merchants stock washers under names like Pegler, Tantofex and Delta as well as under sizes.
That is the argument for an assortment box rather than a guess. Buying one washer means a fifty fifty chance of a second trip with the water still off. An assorted pack means you open the tap, hold the old washer against the new ones and pick the match.
The one to own if you look after more than one tap
Arctic Hayes 170 Piece Tap Washer Repair Kit
- 170 washers across the sizes and patterns common on UK taps
- Carry case with 12 fixed compartments, so sizes stay separated
- Arctic Hayes is a plumbing spares brand sold through merchants rather than a generic import
- Also stocked by B&Q, so it is worth comparing before you buy
Pros
- Compartmented and labelled, which is the real advantage over a bag of mixed rubber
- Covers the awkward pattern-specific washers, not just plain flat ones
- Removes the second trip out with the water still off
Cons
- Far more washers than one household will use in a lifetime
- Overkill if you have exactly one dripping tap and no intention of ever doing this again
- Sold at noticeably different prices depending on the retailer, so it pays to check both
For a single tap, an assorted card of washers costing a few pounds does the job. This is the one to buy if you are a landlord, look after an elderly relative's house, or simply want the right washer in the drawer the next time rather than a guess.
While the headgear is out, look at the O-ring on the spindle too. If the drip was from the base of the handle rather than the spout, the washer was never the problem and the O-ring is. Most assorted packs include them.
Reassembly, and the check that saves you doing it twice
Before the headgear goes back, wipe out the inside of the tap body with a cloth wrapped round a finger. Grit and flakes of old scale sitting on the seat will hold a brand new washer open and you will swear the washer was faulty.
Screw the headgear back in by hand first to make sure it is not cross-threaded, then nip it up with the spanner, second spanner on the tap body again. Do not overtighten it. The headgear seals on a fibre or rubber washer under its shoulder, not on brute force, and overtightening distorts that seal, strips the thread in a soft brass body, or crushes the new washer so it fails early.
Now the step almost everyone skips. With the handle still off, close the tap spindle by hand, open the isolating valve or stopcock slowly, and watch the top of the headgear for thirty seconds. Any weeping round the headgear means it needs another light nip or the seal under it is not seated. Finding that out now takes ten seconds. Finding it out after the handle, screw and index disc are back on takes ten minutes.
Once it is dry, put the handle back on, fit the screw, press the index disc home, and run the tap properly. Do not be alarmed if it spits and coughs air for a few seconds. If it keeps doing it, an airlock may have formed while the supply was off.
When changing the washer will not fix it
Sometimes you do everything right, the tap is dry for a fortnight, and then the drip comes back. That is a specific diagnosis, not bad luck.
| What happens | What it means |
|---|---|
| Drips again within days or weeks, and the new washer already has a groove in it | The valve seat inside the tap body is pitted or scored, so it is cutting each new washer. It needs reseating. |
| Water weeps from under the handle, not the spout | The O-ring or the gland packing, not the washer. Different part, different fix. |
| Still drips the moment you finish, no improvement at all | Either debris on the seat, or the tap is a ceramic cartridge type and there was never a washer doing the sealing. |
| Water appears in the cupboard below | The tail or back nut moved while you were undoing the headgear. Deal with this first, it will do more damage than the drip ever would. |
A worn valve seat is the common one, especially in hard water areas. The seat is the brass ring inside the body that the washer presses onto, and years of grit and scale chew a ridge into it. A tap reseating tool screws into the tap body where the headgear was and cuts that face flat again. They come with 1/2 inch and 3/4 inch cutters to match the two common tap sizes, they cost well under twenty pounds, and they turn a tap you were about to replace into one that works.
Cut lightly and evenly. The aim is to skim the ridge off, not to remove metal. Overdo it and you thin the seat, which is not repairable. If the seat is too far gone, nylon seating washers that sit over the damaged face are the usual alternative to replacing the tap.
Check tap reseating tools on AmazonIf the symptoms above do not match what your tap is doing, work through the fault properly rather than changing parts in hope. Our guide to fixing a dripping tap covers the full set of faults, including ceramic cartridges, O-rings, gland packing and worn valve seats.
Where this stops being a DIY job
Changing a tap washer is a genuine DIY job, and this site will say so plainly rather than hedging. There is no gas involved, no regulated appliance, and nothing here legally requires a registered engineer. Plenty of people will do this successfully with no experience at all.
That said, three situations turn it into something else, and knowing them in advance is worth more than pressing on.
- The tap will not come apart. A headgear that will not shift under two spanners is seized in, usually by corrosion between brass and the tap body. More force snaps the body. At that point the economics have changed and you are choosing between a plumber and a new tap.
- You cannot stop the water. No working isolating valve and a stopcock that will not close, or will not close fully, is a different job from a washer change and it needs sorting before anything else.
- There is a leak at the tail or the back nut. Working blind above your head in a vanity unit, on a joint you cannot see properly, is how a drip becomes a flood. If it is weeping down there, get someone under it.
Sixteen years behind a merchant counter taught me one pattern above all others here. The people who came back for a new tap were rarely the ones whose washer had failed. They were the ones who had twisted the body, rounded the headgear flats with a pair of pump pliers, or snapped an isolating valve and then had to shut the whole house down. The job itself is easy. The ways of turning it into an expensive one are specific and avoidable, which is why they take up most of this page.
Common questions about changing a tap washer
Is it easy to change a tap washer?
Yes, for a normal tap in reasonable condition it is one of the easier plumbing jobs, and it needs no specialist tools. The difficulty is not the washer, it is the age of everything around it. On a tap fitted in the last ten or fifteen years, expect fifteen minutes. On a tap that has been in since the seventies in a hard water area, expect stiff threads, a seized handle and the possibility that the headgear will not move at all.
Can you change a tap washer without turning the water off?
No. The moment the headgear comes out, the tap body is open to full supply pressure with nothing to stop it. On a mains-fed cold tap that is a jet of water into the room, not a trickle. There is no technique that gets round this, and anyone suggesting otherwise has not tried it. Isolate at the valve or the stopcock, then open the tap to prove the pressure is gone.
What tools do I need to change tap washers?
Two adjustable spanners, a flat screwdriver, a crosshead screwdriver, a cloth and the washers. The second spanner is the one people leave out and it is the one that prevents the expensive mistake. Water pump pliers can replace a spanner at a push, but pad the jaws, because they will chew chrome and round off the headgear flats.
How much does a plumber charge to change a tap washer?
There is no reliable published figure for this specific job, and any page quoting you a precise national average is guessing. What is worth understanding is how the pricing works: the washer itself costs around two pounds, and the labour is well under an hour, so you are almost entirely paying for a tradesperson's minimum charge to attend. That minimum varies widely by region and by time of day. Get a price for the visit before anyone travels, and ask specifically what happens to the price if the tap turns out to need reseating or replacing.
Can I fix a dripping tap myself?
If it is a compression tap and the drip is from the spout, yes, and this page is the procedure. If it is a quarter-turn ceramic tap, the fix is a replacement cartridge rather than a washer, which is also a DIY job but a different one. If the water is appearing anywhere other than the spout, diagnose it before you dismantle anything.
How do I fix a dripping tap washer that keeps failing?
A washer that fails repeatedly is being destroyed by something, and that something is nearly always a scored valve seat. Take the headgear out and run a fingertip round the brass ring inside the tap body. If you can feel a ridge or a rough patch, reseating the tap is the fix. If the seat is smooth and the washer still fails, check you are fitting the right profile of washer for that tap pattern rather than a plain flat one.
Related guides
- How to fix a dripping tap, the diagnostic companion to this page, for working out which fault you have before you buy a part.
- Types of taps explained, if you want to identify what you have before you take anything apart.
- DIY plumbing tools worth owning, for the kit that actually gets used rather than the kit that sits in a drawer.
- What is a bib tap?, because the outside tap dripping into the drain uses the same washer arrangement.
- What limescale is and how to deal with it, which explains why taps in hard water areas seize and why seats wear out faster.
- No running water: what to check, including where to find your stopcock before you need it.



0 Comments