
As an Amazon Associate I earn from qualifying purchases.
Almost every guide to fixing a dripping tap tells you to change the washer. That advice is fine if you own a traditional tap, and completely useless if you own a quarter-turn tap, because a quarter-turn tap does not contain a washer to change. It contains a ceramic disc cartridge. Take one apart looking for a rubber washer and you will not find one.
Three things stood out when I looked at what currently ranks for this question. Google's own AI Overview gives eight steps for a washer tap and then adds a line at the bottom offering to help if yours is a mixer or a ceramic tap, which is an admission that it has only answered for half of the people asking. Page one is Wickes, a housing association, Southern Water, CORGI HomePlan and AXA, and only CORGI mentions checking the tap seat at all. And the related searches are full of "how to fix dripping tap from base" and "how to fix a dripping tap without taking it apart", neither of which anybody on page one answers head on.
So this page does the diagnosis. Which tap you have, where the water is actually coming from, and which of the five or six possible faults you are dealing with. Once you know that, the repair itself is usually twenty minutes.
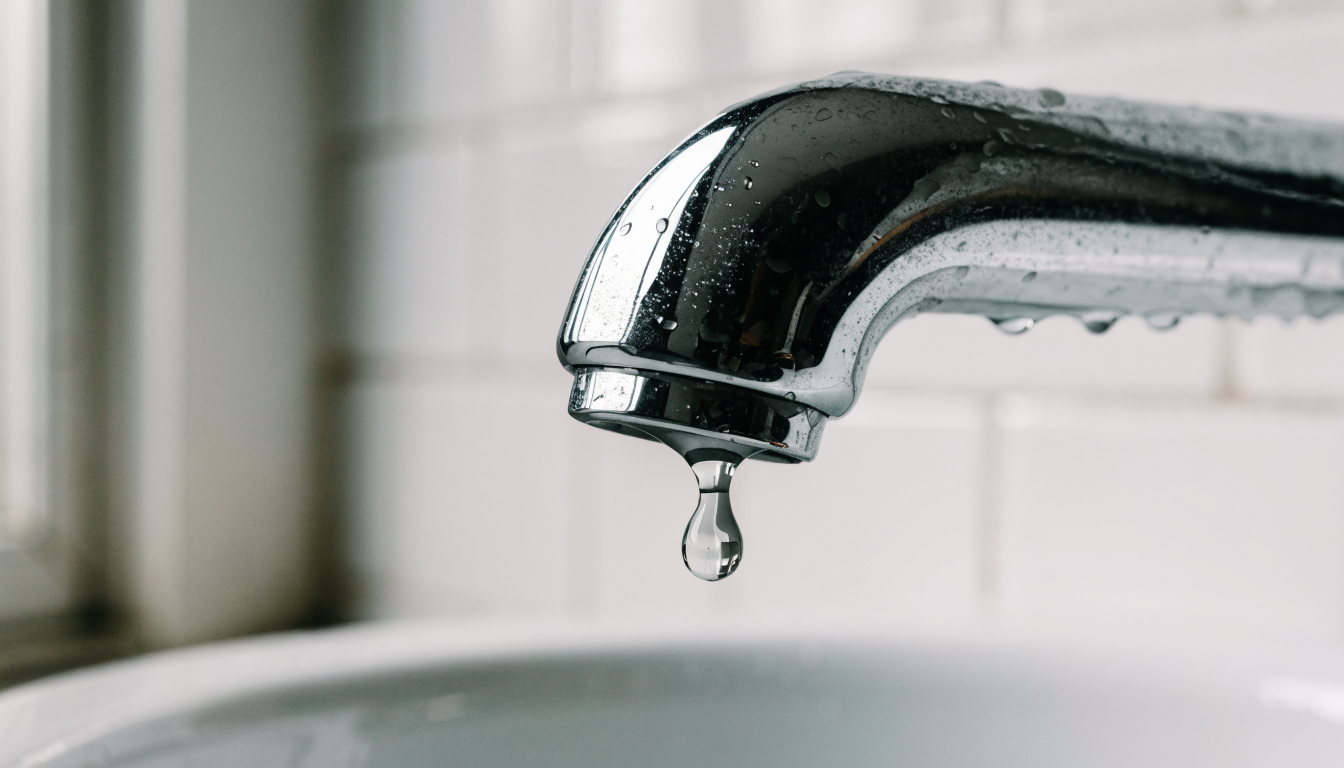
Step one: work out which type of tap you have
You do not need to take anything apart to do this. You need to turn the handle and count. This single test decides which part you are going to buy, and getting it wrong is the reason so many people end up at a merchant counter holding a bag of washers for a tap that has never had one.
If you are still not sure what you are looking at, our guide to the different types of taps used in UK bathrooms and kitchens goes through each style with what sits inside it. For single-lever kitchen and basin taps specifically, monobloc mixer taps covers how the cartridge and the tails are put together.
Step two: work out where the water is actually coming from
This changes the answer completely, and it is the bit people skip. "My tap is leaking" covers at least four different faults with four different parts. Dry the whole tap and the surface around it with kitchen roll, then watch it for a couple of minutes.
If the water is appearing somewhere you cannot trace at all, or the meter is turning with everything off, that is a different job. Our guide to detecting plumbing leaks covers how to narrow it down before you start opening things up.
Turn the water off properly, and the warning nobody gives you
Look under the basin or sink. Most taps fitted in the last twenty-five years have a small isolating valve on each tail, either a chrome body with a screwdriver slot or a small lever. Turn the slot so it sits across the pipe, or move the lever to ninety degrees from the pipe, and that tap is isolated without touching the rest of the house.
If there is no isolating valve, you are going to the stopcock. In most UK homes that is under the kitchen sink, though it can be in a downstairs cloakroom, a hallway cupboard or a garage. Turn it clockwise to close. If the tap you are fixing is fed from a cold tank in the loft rather than the mains, closing the stopcock will not stop it, and you need the gate valve on the tank outlet instead.
Either way, open the tap fully afterwards and let it drain until it stops. That relieves the pressure and empties the column of water sitting above the valve, which is what otherwise ends up in your sleeve.
A dripping traditional tap: the washer, and the part everyone forgets
On a compression tap, the handle screws a brass headgear valve down until a rubber washer presses onto a brass seat machined into the tap body. Water stops because rubber is soft enough to fill the tiny imperfections in the brass. Over years the rubber compresses, hardens and grooves, and eventually it no longer seals however hard you turn the handle.
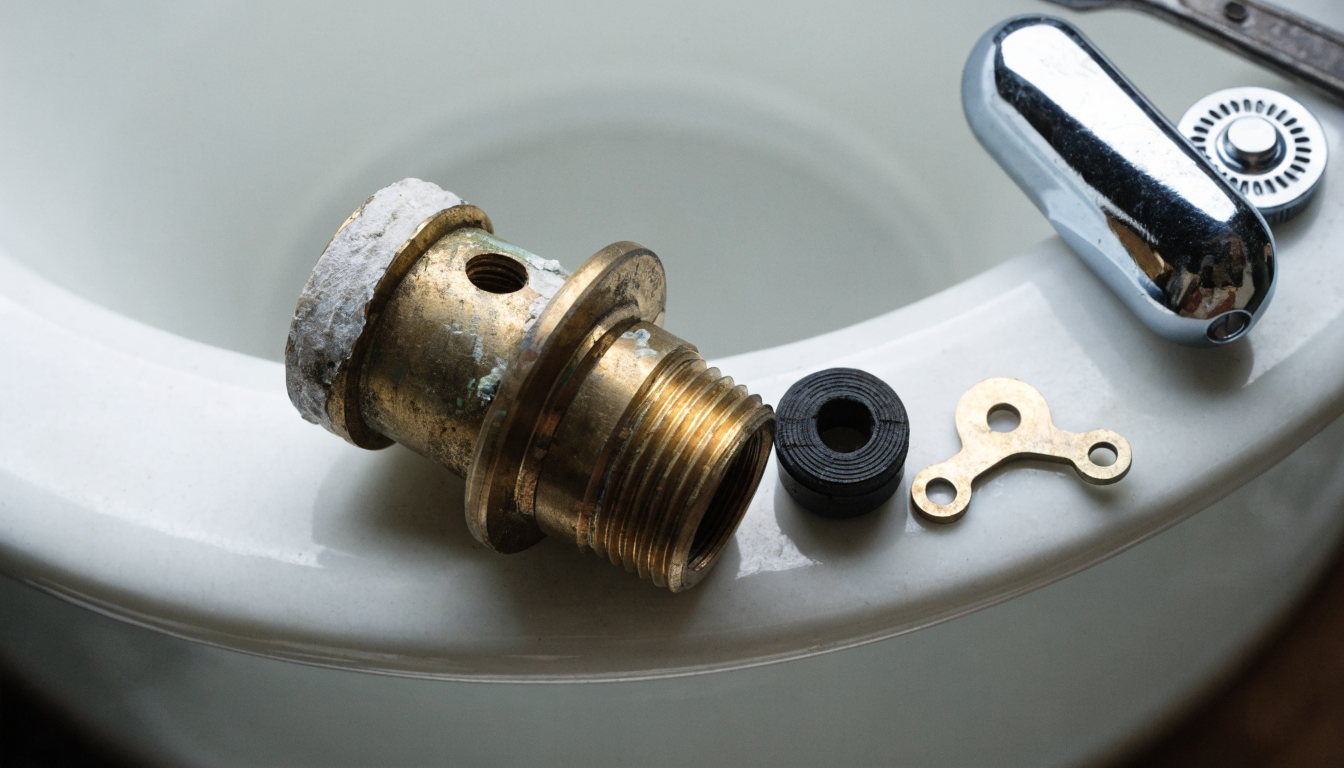
That is the classic fix and it is the right one perhaps three quarters of the time on a traditional tap. We have kept the full procedure on its own page so it is not buried in diagnosis: how to change a tap washer takes you through it step by step, with the sizes and the bits that catch people out.
The part people forget is the jumper. On many taps the washer sits on a small brass disc with a stem, and that stem locates in the bottom of the headgear. If the jumper is corroded, bent or has worn a step where the washer sits, a new washer on an old jumper will still weep. Washer and jumper are sold together for a reason. At the merchant counter, the people who came back a fortnight later were almost always the ones who had changed the rubber and put the old jumper straight back in.
"I changed the washer and it still drips": the worn valve seat
This is the case nearly every competitor page skips, and it is the reason that sentence is one of the most common complaints in UK DIY forums.
The brass seat that the washer presses onto is not immortal. Years of grit, limescale and metal-on-rubber contact leave it pitted, ridged or scored. A new washer then has to seal against a surface that is no longer flat. It will work for a few days or a few weeks, because fresh rubber is soft enough to mould into the damage, and then it takes a permanent impression of the pitting and starts to drip again.
How to tell: with the headgear out, shine a torch down into the tap body. You are looking at a brass ring at the bottom. If it is bright, smooth and unbroken, the seat is fine. If it is dull, pitted, green, or has a visible circular groove worn into it, that is your fault. You can also run a fingertip over it, carefully. A good seat feels like a smooth ring. A worn one feels rough.
There are two honest ways out. A reseating tool is a hand-turned cutter that sits on the tap's own thread and machines the brass seat flat again, which is what the trade has done for decades and it works. Or a seat and jumper kit, sometimes sold as a nylon seating washer, which drops a new plastic seating face over the damaged brass and gives the washer something fresh to close onto. The kit is cheaper and faster. The reseater lasts longer and is the better answer on a good quality tap you want to keep.
If your water is hard, expect to meet this more often. Limescale accelerates seat wear badly. Our explainer on what limescale actually is and how it forms covers why the south and east of England chew through tap internals faster than the north and west.
How to stop a mixer tap dripping: the ceramic cartridge
On a quarter-turn or single-lever tap there is no washer and no seat to reseat. Two polished ceramic discs sit face to face inside a cartridge. Rotating one relative to the other lines up or blocks the ports. The seal is ceramic against ceramic, which is why these taps shut off with a definite stop instead of getting progressively tighter.
They drip for two reasons. Either grit or scale has got between the discs and is holding them fractionally apart, or a disc face has been scratched or chipped. The first is repairable, the second is not.
- Take the cartridge out and look at the faces. Isolate the tap, prise off the indicator cap, undo the grub screw or central screw, lift the handle, unscrew the shroud, then undo the retaining nut. The cartridge lifts straight out.
- If the faces are gritty or scaled, clean them. A soak in a fifty-fifty mix of white vinegar and warm water for ten to fifteen minutes, then a soft brush, will shift scale without attacking the ceramic. Rinse and dry properly before it goes back.
- If you can see a scratch, chip or cloudy wear mark on a disc face, replace it. Cleaning a damaged disc buys you a week at best. Ceramic does not polish out.
- Check the O-rings at the same time. The rings around the body of the cartridge harden with age and cause a slow weep that looks exactly like a cartridge fault. They cost pennies and you already have the tap apart.
- Do not overtighten the retaining nut on reassembly. Firm is enough. Cranking it down distorts the cartridge body and can crack a disc, which turns a repairable tap into a new tap.
The hard part is not the work, it is buying the right cartridge. Quarter-turn valves on separate hot and cold taps come in handed pairs and are specified by thread size, usually half inch BSP, by overall length, and by the spline count on the top where the handle grips. Twenty splines and twenty-eight splines are both common and they are not interchangeable. Single-lever monobloc cartridges are specified by diameter, most often 35mm or 40mm, plus the pin pattern on the base.
Take the old one with you, or measure it before you order. This is where most of the returns came from. A cartridge is a cheap part, but the wrong cartridge is worth nothing at all, and on branded taps such as Grohe, Bristan, Franke or Hansgrohe the manufacturer's own part is often the only one that genuinely fits.
How to fix a leaking mixer tap at the base or the body
If the water is not coming out of the spout, the cartridge is not your problem and no amount of changing it will help. Three things leak on a mixer body.
The swivel spout. On a kitchen mixer that swings side to side, the spout sits in the body on two or three O-rings. Wear there produces water running down the outside of the body and pooling at the base whenever the tap runs. Pull the spout up and off, replace all the O-rings rather than just the obviously tired one, and smear them with silicone grease rather than fitting them dry.
The base seal. Monoblocs sit on a rubber or foam gasket and are held down by a back nut or a threaded plate underneath. If the seal has perished or the fixing has slackened, the tap rocks slightly in use and water tracks down the hole into the cupboard. Tighten from below first. If it still weeps, the tap has to come off to replace the gasket.
The flexible tails. The braided hoses on a monobloc are a consumable, not a permanent fitting. They fail at the crimp and at the nut. A wet cupboard with a dry tap body above it is a tail, a tap connector washer or the isolating valve, in roughly that order of likelihood. Replacing a pair of flexis is cheap and considerably less annoying than replacing a kitchen carcase.
One thing to rule out before you start: very high incoming mains pressure makes every one of these seals fail sooner, and it also makes taps hammer when you close them. If you have that, our guide to troubleshooting water pressure explains how to check it and what to do about it.
What a dripping tap actually costs you
Waterwise, the UK water efficiency organisation, publishes a figure for this: a tap dripping at a rate of one drip per second loses over 12,000 litres a year. That is their number, not mine, and it is the one worth quoting because it is tied to a stated drip rate rather than being a vague "a lot of water".
Twelve thousand litres is twelve cubic metres, and a cubic metre is what your meter charges you by. The arithmetic below uses Essex and Suffolk Water's published metered charges applying from 1 April 2026, because they were verifiable at the time of writing. Your own rates will differ, and the sewerage rate varies a lot by region.
The parts and tools worth owning
You do not need most of this. Match the list to the fault you diagnosed above, not to the article.
| Product | Fixes | Buy this if | Buy |
|---|---|---|---|
Traditional taps 1/2 inch flat tap washer and jumper, bag of 5 | Drip from the spout on a compression tap | You counted several turns and the seat looks clean | Check price on Amazon |
Rubber O-ring and tap seal assortment, 202 pieces | Weeping handles, swivel spouts, base seals | The leak is anywhere other than the spout | Check price on Amazon |
Quarter-turn taps 1/2 inch 20-spline ceramic disc valve, hot and cold pair | Drip from the spout on a quarter-turn tap | Your old cartridge measures 1/2 inch BSP with 20 splines | Check price on Amazon |
The seat fix Silverline MS128 tap reseating tool, 3/4 inch and 1 inch | A pitted brass seat that eats new washers | A new washer dripped again within weeks | Check price on Amazon |
DURATECH 280mm basin spanner, 10 to 32mm jaw | Back nuts and tail nuts you cannot reach | You are working on the base or the tails, not the top | Check price on Amazon |
VCE PTFE thread seal tape, 12mm x 13m | Threaded joints on tails and connectors | You are remaking any threaded connection | Check price on Amazon |
Replace the seized one UKDD 15mm full bore lever isolating valve, WRAS approved | An isolating valve that will not turn or will not seal | Yours is a stiff screwdriver-slot type | Check price on Amazon |
Two of those are worth more explanation, because they are the ones that actually change the outcome rather than just doing the job.
For the tap that keeps dripping
Silverline Imperial Tap Reseating Tool 3/4 inch and 1 inch (MS128)
- Hand-operated cutter that machines the brass seat flat again
- Supplied with hardened 3/4 inch and 1 inch cutters, which cover standard 1/2 inch and 3/4 inch BSP UK taps
- Steel construction, no power tool needed
Pros
- Fixes the underlying fault rather than masking it
- One tool does every traditional tap in the house, and the neighbours
- Far cheaper than replacing a good quality tap
Cons
- Only relevant to traditional compression taps, useless on anything ceramic
- Takes a light hand: over-cutting removes more brass than you want
- Reviews are mixed on the cheaper end of this market, and the cutters are the part that matters
If you have changed a washer and the tap started dripping again within a few weeks, this is the tool that ends it. Judged on specification and on what the trade has used for decades rather than on hands-on testing.
Fit this before you need it
UKDD 15mm Full Bore Butterfly Lever Isolating Valve, WRAS Approved
- 15mm compression both ends, fits standard UK copper tails
- Full bore, so it does not throttle flow the way a reduced-bore valve does
- Butterfly lever handle rather than a screwdriver slot
- WRAS approved, rated to PN16
Pros
- A lever you can see and grip, so you know whether it is open or shut
- Full bore is the right choice where a reduced-bore valve would drop pressure
- Colour coded handles make hot and cold obvious under a dark cupboard
Cons
- Costs several times what a basic screwdriver-slot valve costs
- Physically larger, which matters in a tight pedestal
- Fitting one means cutting into the pipework, which is a bigger job than the tap repair itself
The case for this is not the valve, it is the seized valve you are replacing. If yours would not turn, or turned without shutting off, put a proper lever valve in while the pipework is already drained.
Trade counter prices, if you would rather walk in
Tap washers are one of the few things still cheaper over a trade counter than online, largely because the postage on a fifty pence part is absurd. Prices checked on 18 September 2026.
| Part | Retailer | Price |
|---|---|---|
| Pillar tap washer 1/2", 10 pack | Toolstation | £1.29 |
| Tap washer with jumper, dome 1/2", 2 pack | Toolstation | £1.69 |
| Arctic Hayes Holdtite flat tap washers 5/8", 2 pack | Screwfix | £1.97 |
| Arctic Hayes 170 piece tap washer box | Toolstation | £10.30 |
| Flume full bore isolating valve, chrome, 15mm | Toolstation | £3.55 |
| Flomasta full bore isolating valve 15mm | Screwfix | £3.55 |
| Flat faced male straight isolating valve 15mm x 1/2" | Toolstation | £2.75 |
A basin spanner, an adjustable spanner and a decent set of screwdrivers cover almost all of this. If you are building a kit from nothing, the DIY plumbing tools worth owning goes through what actually earns its place in a domestic toolbox.
When to replace the tap instead of repairing it
Repair is usually right. These are the cases where it is not.
- The body is cracked or the chrome is lifting and flaking. Plating failure means the brass underneath is corroding. New internals in a failing body is money thrown at a tap that is going anyway.
- You cannot identify or source the cartridge. Unbranded taps from a bathroom suite or an online marketplace often have cartridges made in one production run and never seen again. If you cannot match it on measurement, the tap is effectively a consumable.
- The seat is so far gone that reseating would take it past the thread. There is a limit to how much brass you can cut away.
- It is a low pressure tap on a system that no longer suits it. If the house has been converted to a combi and the taps are old gravity-fed types, replacing them fixes flow as well as the drip.
- Two or three faults at once. A tap that is dripping from the spout, weeping at the handle and leaking at the base is telling you every seal in it has aged out together.
The awkward truth about replacement is that removing an old tap is usually harder than fitting the new one, because the back nut is in a space designed for nobody's hands and is often corroded solid. Budget more time for the removal than the installation. If the tap is an outside one, our guide to bib taps covers the fittings you will be dealing with.
When this will not fix it
Some drips are not the tap's fault at all, and changing parts will not touch them.
- A tap that runs briefly after you close it and then stops. That is the pipe draining, not a leak. Normal, particularly on a long run or a bath tap.
- A hot tap that dribbles occasionally with nobody using it. On an unvented cylinder or a vented system this can be thermal expansion pushing water back through the nearest outlet. That points at the cylinder's expansion vessel or the expansion pipe, not the tap, and on an unvented cylinder it needs a registered engineer.
- Water appearing at the base of a tap that has just been descaled or had a strong cleaner used on it. Some limescale removers attack the seals. Ours on which limescale removers damage what goes through which acids are safe on which finishes.
- A tap that drips only when another outlet is running. That is a pressure or crossflow issue in the system, usually a failed non-return valve or a mixer letting hot and cold cross over.
- Tightening the handle harder each time. This is not a fix, it is damage. Every extra turn crushes the washer further into the seat and accelerates the pitting that causes the next failure. If it needs force to stop, the part is worn.
Where this stops being a DIY job
Changing a washer or a cartridge is a homeowner job in the UK and always has been. A few things next to it are not.
Work on an unvented hot water cylinder, including its expansion vessel and safety valves, must be done by someone holding the relevant competence qualification, and it is notifiable work under Building Regulations. Anything on a gas appliance or its flue is legally Gas Safe registered work under the Gas Safety (Installation and Use) Regulations 1998, with no DIY exemption. I am not a plumber and I have never held Gas Safe registration, which is precisely why those two lines are stated as law rather than as advice.
Beyond that, call someone if the stopcock will not close, if you cannot isolate the tap at all, if a compression joint starts weeping after you have remade it twice, or if the leak is coming from inside a wall or under a floor rather than from the tap.
Frequently asked questions
Do I need a plumber for a dripping tap?
Usually not. A spout drip on a traditional tap or a ceramic tap is a parts swap with hand tools and it is not notifiable work. The point at which you want a plumber is when you cannot isolate the water, when the stopcock is seized, or when the tap itself has to come out and the back nut has corroded solid.
Why is my tap still dripping when I turn it off?
Because the sealing face is no longer sealing. On a traditional tap that is a hardened washer, a worn jumper, or a pitted brass seat. On a ceramic tap it is grit between the discs or a damaged disc. Turning it harder will not close the gap and will make the underlying wear worse.
How do I tighten a tap to stop it dripping?
You do not, and this is worth being blunt about because it is one of the most searched versions of this question. The only tightening that legitimately stops a leak is tightening the gland nut under the handle when a tap weeps around the spindle, or tightening the back nut underneath when the body rocks. A drip from the spout is never solved by tightening anything.
What are the common causes of dripping taps?
In rough order of how often they turn up: a worn rubber washer, a worn or scaled ceramic cartridge, a pitted valve seat, perished O-rings on the spindle or swivel spout, a failed base seal, and a leaking flexible tail. Hard water speeds up every one of them.
Can I fix a dripping tap myself?
Yes, if you can isolate the water and you have correctly identified which type of tap you have. The failure mode is not the work, it is buying the wrong part, which is why the tap type test at the top of this page matters more than the procedure does.
Is it safe to leave a dripping tap?
Safe, mostly, but not harmless. It wastes over 12,000 litres a year at one drip per second according to Waterwise, it costs you real money on a meter, and the constant flow of water will stain and scale the basin. A drip at the base or in the cupboard is the one to treat as urgent, because that quietly destroys chipboard.
Where are the washers in a mixer tap?
On a modern mixer, there usually are not any in the sense people mean. The flow is controlled by ceramic discs inside a cartridge, not by a washer on a seat. There are O-rings around the cartridge, the spindle and the swivel spout, and there is a seal under the tap body, but nothing that a bag of tap washers will fix. Older two-handle mixers with multi-turn handles are the exception and do have conventional washers.
How much will a plumber charge to fix a dripping tap?
I am not going to give you a figure, because there is no published national price and every number you will see quoted for this is an aggregator's estimate rather than anything a plumber committed to. What I can tell you is what moves it: whether it is a minimum callout or an hourly rate, whether the isolating valve works, whether the part is a standard washer or a branded cartridge that has to be ordered, and whether it is inside London. Get the tap type and the fault identified before you ring round, because "my tap drips" and "my quarter-turn tap needs a 35mm cartridge" get you very different quotes.
Related guides
- How to change a tap washer for the full step by step once you have confirmed you have a traditional compression tap.
- Types of taps if you want to see every style side by side before you decide whether to repair or replace.
- Monobloc mixer taps explained for how the cartridge, the tails and the base fixing are put together on a single-lever tap.
- Detecting plumbing leaks for when water is appearing and you cannot work out where from.
- DIY plumbing tools for homeowners for the kit that covers this job and the next dozen.



0 Comments