

As an Amazon Associate I earn from qualifying purchases.
Black mould on silicone sealant comes off with a bleach or fungicidal cleaner held in contact with the joint for several hours, usually overnight. That works when the mould is sitting on the sealant. Once it has grown into the sealant, no cleaner on sale in the UK will shift it, because the staining is below the surface and the mould is in the body of the silicone.
That second sentence is the one almost every page on this subject leaves out, and it is why so many people work through three different sprays and conclude that nothing works. Nothing does work, on that joint. The fix is to cut the bead out and reseal. This guide covers both routes, tells you in about twenty minutes which one you are on, and then deals with the reason it happened, which is almost never the sealant.
Written by Nick Jolliffe. I spent 16 years running plumbers merchants across the south of the UK. I am not a plumber and I have never held Gas Safe registration, so nothing here is presented as hands-on testing. What it is based on is product specification, manufacturer documentation and a long run of watching which sealants came back over the counter and which did not.
First work out whether the mould is on the sealant or in it
Silicone itself is not food. Mould does not eat it. What mould eats is the film of soap residue, body oils, shampoo and skin cells that builds up along a wet joint, plus the plasticisers and fungicide carriers that migrate out of the sealant as it ages. Early on, that colony sits on the surface film and lifts off. Later, it works into the microscopic cracks and pits that open up in a bead as it weathers, and at that point it is inside the material.
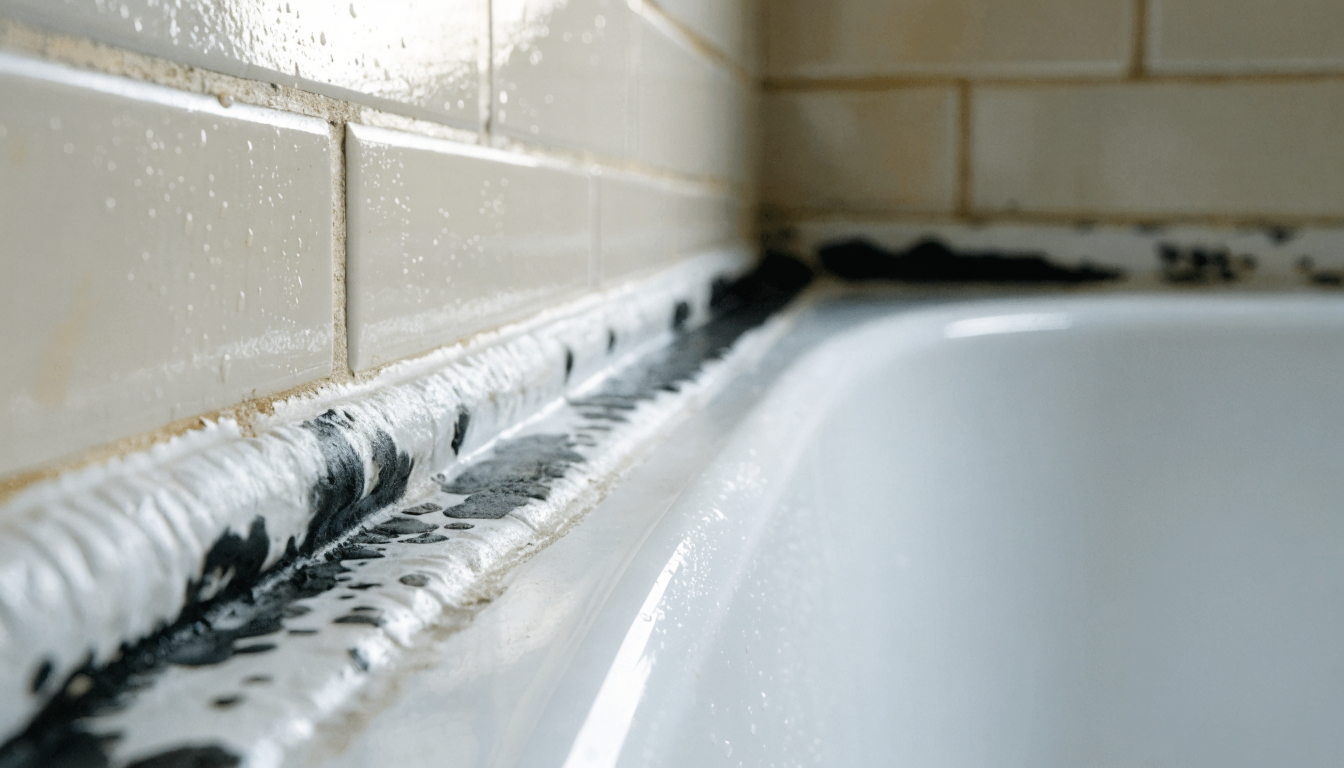
The test takes one cotton wool pad and about twenty minutes. Soak the pad in mould remover or in thin bleach, press it onto a small patch of the worst area, leave it for fifteen to twenty minutes, then lift it and wipe with a damp cloth. Surface mould goes noticeably lighter, often patchy but clearly changed. Ingrained mould looks exactly the same as it did before. There is no partial result to interpret: it either faded or it did not.
How to remove black mould from silicone sealant: the contact time method
The single reason people conclude that bleach does not work on sealant is that they sprayed it onto a vertical or near-vertical joint, where it ran off within seconds. Bleach kills mould, but it needs to stay wet on the surface to do it, and thin household bleach on a bath edge has a working life of about thirty seconds before gravity wins.
The fix is to hold the bleach against the joint physically. That is what the kitchen roll trick is for, and it is genuinely the method that works, not a folk remedy.
- Open the window and run the extractor fan before you start. You are about to leave bleach evaporating in a small room for hours. Ventilation is not optional here, it is the whole safety plan.
- Clean the soap film off first. Wipe the joint with washing-up liquid and a cloth, then rinse and dry it. Bleach spends itself on organic soil, so leaving a greasy film in place wastes most of its strength before it ever reaches the mould.
- Twist kitchen roll or cotton wool into a rope the length of the joint. Cotton wool holds more liquid per centimetre and does not disintegrate, which matters on an overnight soak. Kitchen roll is fine for four to six hours.
- Soak the rope in thick bleach and press it onto the bead. Thick or gel bleach clings where thin bleach runs. A ready-made mould remover is easier still, because the ones formulated for this job are sold as gels or clinging foams for exactly this reason.
- Leave it four hours minimum, overnight for anything stubborn. This is the step everyone shortens and it is the step that does the work. If the rope dries out, top it up rather than starting again.
- Lift the rope, scrub lightly with an old toothbrush, rinse thoroughly. Rinse properly. Bleach left sitting on silicone for days will soften and degrade it, which is the real answer to whether bleach damages sealant.
- Dry the joint completely and look at it in daylight. If it is white again, you are done. If it is the same shade it was yesterday, stop buying cleaners and read the resealing section below.
One overnight soak is a rescue, not a routine. Repeating it every month will shorten the life of the bead noticeably, and the sealant you are trying to save will be perished within a couple of years. If you are reaching for it that often, the joint has already failed the test above and the money is better spent on a fan that actually clears the room.
Never mix bleach with anything else in a bathroom
This matters more here than it does almost anywhere else in the house, because limescale and mould turn up on the same joint at the same time and the obvious move is to attack both in one session. Several of the pages currently ranking for this search recommend bleach in one paragraph and a limescale treatment a few paragraphs later without a word of warning between them.
What to use on surface mould, and what to skip
| Treatment | Does it work on sealant | What you need to know |
|---|---|---|
| Thick or gel bleach, held in contact | Yes, on surface mould | Cheapest route. Needs the kitchen roll or cotton wool rope, needs hours, needs a thorough rinse. |
| Mould remover formulated as a gel or foam | Yes, on surface mould | Same active chemistry as bleach in most cases, but formulated to cling to a vertical joint. You are paying for the not running off. |
| White vinegar | Weakly, and slowly | Acetic acid will kill some mould species but it does not bleach the stain out, so a killed colony still looks black. Never use it after or with bleach. |
| Vinegar and bicarbonate of soda paste | Largely theatre | The two neutralise each other on contact. What is left is a mild abrasive paste and a fizz. It is the most recommended method on this search and the weakest. |
| WD-40 | No | It is a water displacing oil. It will lift a light surface film and make the bead look better for a week, then leave an oily residue that mould feeds on. It also contaminates the joint for any future resealing. |
| Scrubbing with an abrasive pad | Actively harmful | Scratching the bead opens the surface up and gives next year's mould somewhere to root. Use a soft toothbrush or nothing. |
| Steam cleaner | Sometimes, briefly | Kills what it touches and leaves the stain. Also drives moisture into the joint, which is the opposite of what you want. |
If you want one product that does this job without the overnight rope, a clinging mould remover is the sensible buy. It is the same chemistry, presented so that it stays where you put it.

Best for surface mould on sealant
HG Mould Remover Spray, 500ml
- Chlorine-based mould and mildew remover
- Clings well enough to work on a vertical joint
- Safe on ceramic tile, grout and cured silicone when rinsed off
- 500ml trigger spray, widely stocked in UK supermarkets and merchants
Pros
- Does not need the kitchen roll rope for light surface growth
- Bleaches the stain out rather than only killing the colony
- One bottle covers a bath and a shower enclosure several times over
Cons
- Chlorine-based, so the no-mixing rule above applies in full
- Strong smell in a small room, ventilation is essential
- Will not touch mould that has grown into the body of the sealant, nothing will
The straightforward answer for a joint that passed the twenty minute test. For anything heavier, soak a cotton wool rope in it and leave it overnight rather than reaching for a second product.
Why nothing works once the mould is inside the sealant
Cured silicone is not solid all the way through in the way it looks. As a bead weathers it develops fine surface crazing, and where the joint flexes with a bath that fills and empties, those cracks open further. Spores get into them, and once the colony is established below the surface there is nothing for a cleaner to reach. A liquid sitting on top of the bead simply does not penetrate far enough, and the stain it leaves behind is pigment that has been deposited in the material.
There is a second reason, and it is the one that catches people out on a bath. If water has been getting behind the bead through a gap, mould will be growing on the wall or the bath lip underneath it. You can bleach the visible face of that sealant to a perfect white and the colony behind it is untouched, which is why it reappears within a fortnight. A bead that keeps blackening in the same 100mm section is almost always telling you it has failed as a seal there.
The honest position is that a mouldy bead is a consumable. Sealant around a bath or shower tray in a family bathroom has a working life of a few years, not a lifetime, and replacing it is a two hour job with about fifteen pounds of materials. That is a better use of a Saturday than a fourth bottle of spray. If the mould extends beyond the sealant onto walls and ceilings, that is a bigger job and it is covered separately in the guide to getting rid of black mould in the bathroom.
How to cut out and replace mouldy silicone sealant
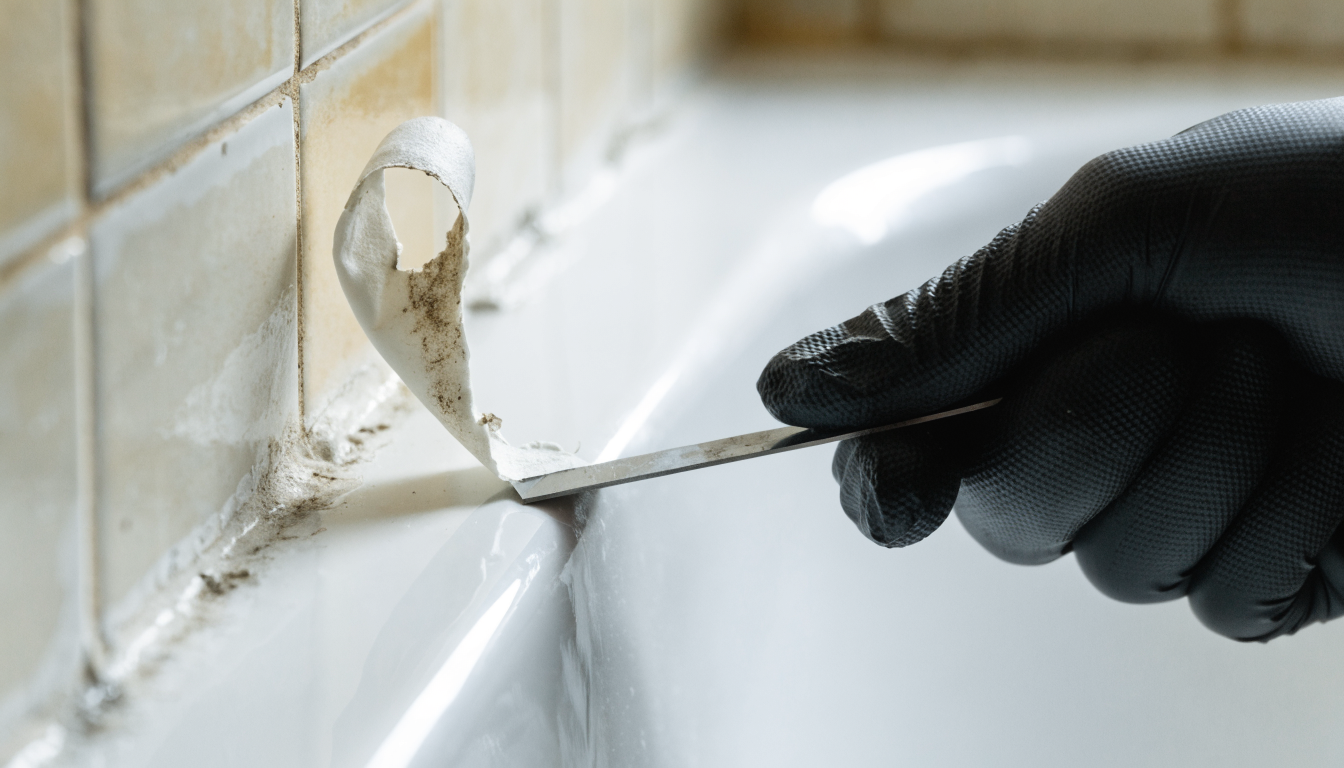
The job is not difficult. It is fiddly, and the part that decides whether it lasts three years or eight months is the preparation, not the sealant you choose.
Cut both faces of the bead
Run a slim blade along the tile face and then along the bath face, keeping the blade flat to the surface. Two cuts release the strip so it lifts out whole. Hacking at it from one side leaves shreds you will spend an hour picking off.
Scrape the residue back to bare surface
A plastic sealant scraper gets the film off without scoring an acrylic bath. Silicone will not stick to old silicone, so any smear left behind becomes a gap in the new seal. Chemical sealant remover softens the last of it if it is being stubborn.
Kill and clean what is underneath
With the bead gone you can finally reach the mould that was living behind it. Treat the open gap with mould remover, rinse, then wipe the whole joint with methylated spirit or isopropyl alcohol to degrease it.
Let it dry properly, then fill the bath
Bone dry, several hours with the fan running. Then fill the bath with water before you seal, and leave it full until the sealant has skinned. A bath drops several millimetres under load, and sealing it empty is the commonest reason a new bead splits within a month.
Apply one continuous bead
Cut the nozzle at 45 degrees and no wider than the gap, then move steadily and do not stop mid-run. Starts and stops are where water gets in. Masking tape either side of the joint gives a clean edge if you want one.
Tool the joint in one pass
A profiling tool in one smooth movement, pulling the excess ahead of it. Going back over a tooled bead drags air into it. Pull the masking tape off immediately, while the silicone is still wet, not after it has skinned.
Leave it alone for 24 hours
Skin time is not cure time. Manufacturers typically quote around 2mm of cure depth per 24 hours for standard sanitary silicone, so check the cartridge and do not use the shower until the stated time has passed. Drain the bath slowly once it has.
The washing-up liquid and finger trick works, but it leaves a soapy film on the fresh silicone and a wavier line than a profiler gives you. A cheap plastic profiling set is a few pounds and is reusable indefinitely. If the tiled joint above the bath also needs attention while everything is open, the grout removal tools guide covers what actually cuts grout out without wrecking tile edges.
Tools and materials for the job
Screwfix list the No Nonsense Sealant Remover 100ml gel at £4.99 and the Vitrex All-in-One Sealant Remover and Profiler Kit 35mm at £9.49, both checked on 18 September 2026. Between them those two cover the chemical and the mechanical side of the removal, and the Vitrex kit doubles as the profiler for step six.
- No Nonsense Sealant Remover 100ml at Screwfix, a gel that softens cured silicone residue on non-porous surfaces
- Vitrex All-in-One Sealant Remover and Profiler Kit at Screwfix, removal blade and profiling heads in one tool
- Screwfix silicone remover range if you want to compare what else is stocked locally
Everything else on the list, plus the sealant and the fan that stops it happening again, is in the table below.
| Product | Job it does | Format | Buy |
|---|---|---|---|
Surface mould HG Mould Remover Spray | Kills and bleaches surface mould on tile, grout and cured silicone | 500ml trigger spray | Check price on Amazon |
Draper Silicone Sealant Remover Tool 24237 | Cuts and scrapes an old bead out without scoring an acrylic bath | Three-blade hand tool | Check price on Amazon |
Gunpla Caulking Tool Kit, 11 piece | Profiles the new bead and gets into internal corners | Scraper, guides and five profiling heads | Check price on Amazon |
Single cartridge UniBond Kitchen and Bathroom Anti-Mould Silicone Sealant | Resealing a bath or shower tray with a fungicidal sanitary grade sealant | 280ml cartridge, white | Check price on Amazon |
Whole bathroom Dryzone Anti-Mould Silicone Sealant, twin pack | Enough for a bath and a shower enclosure in one go, low VOC | 2 x 310ml cartridges, white | Check price on Amazon |
Fixes the cause Manrose QF100T Quiet Extractor Fan with Timer | Clears the moisture that feeds the mould, with an overrun timer | 100mm, 4 inch duct | Check price on Amazon |
Mould-resistant sealant: what the fungicide actually does
Every sanitary grade silicone sold for bathrooms in the UK carries a fungicide. It is not a coating, it is dispersed through the cured sealant and it works by leaching slowly to the surface, which is exactly why it is finite. The fungicide depletes. A bead in a well ventilated bathroom that dries between uses may still be clean after five or six years. The same bead in a windowless shower room used twice a day by four people can start spotting inside eighteen months, and neither result tells you much about the brand.
Two things are worth knowing at the counter. The first is that acetoxy silicone, the type that smells strongly of vinegar as it cures, is the standard sanitary product and is fine on tile, glass, ceramic, acrylic and enamel, but it can corrode some metals and will not stick to a damp surface. The second is that anti-mould and standard silicone from the same manufacturer often look nearly identical on the shelf, and the wrong tube went home with people regularly. Check the cartridge says sanitary, bathroom or anti-mould before you leave.
Beyond that, a longer fungicide guarantee on the cartridge is a claim about the formulation, not about your bathroom. The comparison of what is actually buyable in the UK is in the guide to the best silicone sealants for a waterproof seal.
Prevention: this is a ventilation problem, not a cleaning problem
Mould needs moisture, a food source and time. You cannot remove the food source, because soap and skin cells arrive every time someone showers. What you can remove is the time the joint spends wet. A bathroom that dries out within twenty minutes of a shower does not grow mould on its sealant. One that stays damp until lunchtime will, whatever you seal it with.
| What to change | Effort | How much difference it makes |
|---|---|---|
| Squeegee or wipe the joint after showering | Ten seconds a day | Large, and it is free. Removing the water is more effective than any spray. |
| Leave the door open after use | None | Moderate in a house with decent airflow, almost nothing in a flat with the door shut for privacy. |
| Open the window for twenty minutes | None | Large in summer. In a British winter people close it after two minutes, which is why fans exist. |
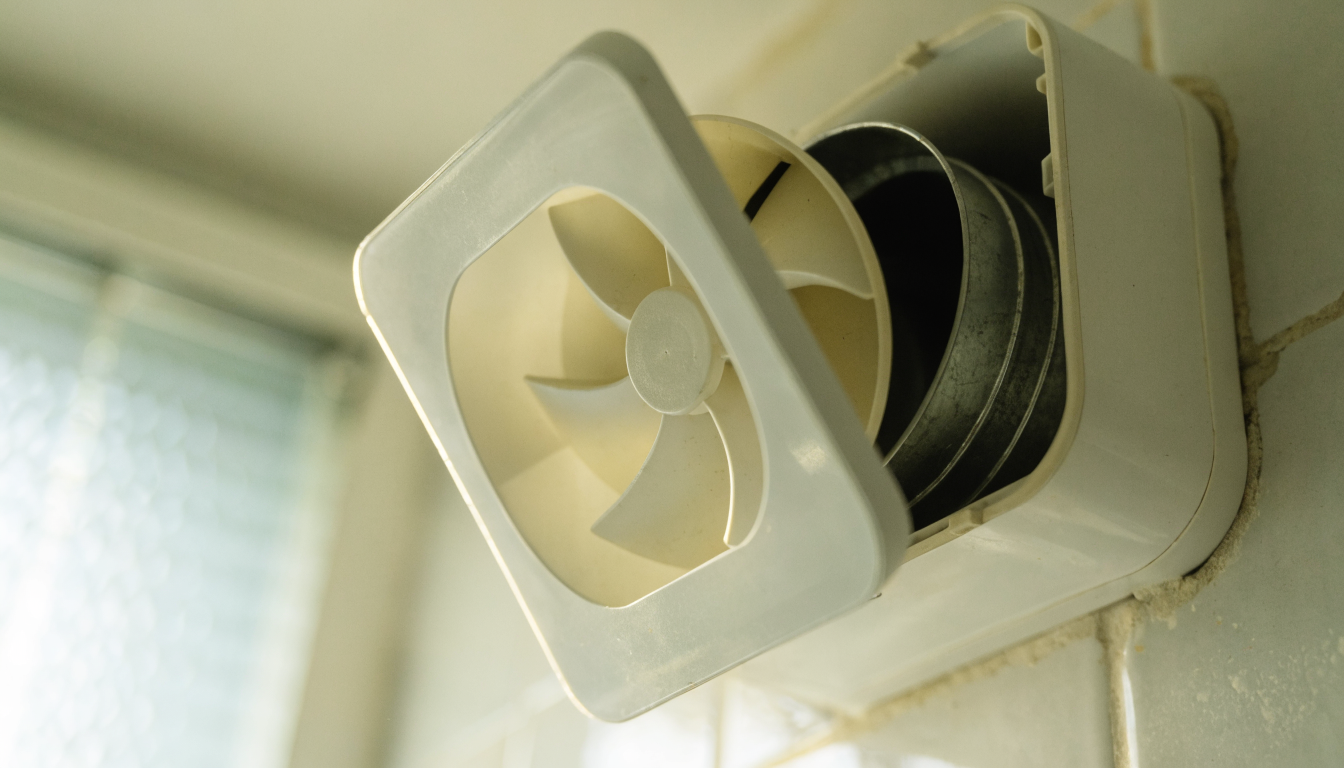
| Fit an extractor fan with an overrun timer | Half a day, or an electrician | Largest single change. The timer is the important part: the room needs clearing after the person has left it. |
| Replace an existing fan that is not shifting air | An hour | Often mistaken for not needing a fan at all. Hold a sheet of paper to the grille. If it does not hold, the fan is not working. |
| Humidity-sensing fan | Half a day, or an electrician | Useful where a fan is wired to the light and people take short showers with the light off in daylight. |
The number of people who came to the counter for another tube of sealant, having replaced the same bath joint twice in three years, was considerable. Nearly all of them had a fan wired into the light switch with no overrun, or a fan ducted into a loft void rather than outside, or no fan at all in a room with a window nobody opens in January. The sealant was never the problem. Sizing a fan to the room and getting the duct run right is covered in the guide to the best bathroom extractor fans.
One more thing that helps and costs nothing: stop using bar soap and heavy conditioners in the enclosure if you can, because those leave the thickest residue film. And keep a daily shower spray on the shelf rather than a monthly deep clean, since it is the film you are trying to prevent, not the mould. The shower cleaners guide covers which of those are worth the shelf space.
Frequently asked questions
How do you get black mould off silicone?
Clean the soap film off first, then hold a thick bleach or a gel mould remover against the joint using a rope of cotton wool or kitchen roll and leave it for at least four hours. Rinse thoroughly. If the stain has not lightened at all after that, the mould is inside the sealant and the bead needs cutting out and replacing.
Why does silicone sealant turn black?
Mould colonises the film of soap, oils and skin cells that collects along a permanently damp joint. The silicone itself is not being eaten. As the bead ages its fungicide depletes and its surface develops fine cracks, so the colony works its way in and the black becomes a stain in the material rather than a deposit on it.
Does WD-40 remove mould from silicone?
No. It is a water displacing oil, not a fungicide. It will wipe a light surface film away and make the bead look better for a few days, then leave an oily residue that mould feeds on. It also contaminates the joint, so if you later decide to reseal you have to degrease it thoroughly first.
Does vinegar get rid of mould on silicone?
Partly. Acetic acid will kill some mould species given long contact, but it does not bleach the pigment, so a joint treated with vinegar can be biologically clean and still look black. That is why people who try vinegar first usually decide it did not work. Never use it alongside or straight after bleach.
Is vinegar harmful to silicone sealant?
Occasional use on a cured bead is not a problem. Acetoxy sanitary silicone releases acetic acid as it cures, which is the vinegar smell, so the material itself tolerates it. Repeated soaking of any acid or bleach on the same joint will shorten its life, and the bigger risk with vinegar is the mixing rule rather than the sealant.
What are the downsides of using vinegar for mould?
It does not remove the staining, it works slowly, it runs straight off a vertical joint just as thin bleach does, and it cannot be combined with any chlorine-based product. The vinegar and bicarbonate of soda paste recommended on most pages about this is weaker still, because the acid and the alkali neutralise each other as soon as they meet.
Does bleach damage silicone sealant?
A single overnight soak followed by a proper rinse will not ruin a sound bead. Repeated or prolonged exposure will: the sealant softens, loses elasticity and eventually perishes at the edges. Treat the overnight soak as a one-off rescue rather than a monthly routine, and if you need it monthly the bead has already failed.
How do you remove black mould from sealant without bleach?
Options are limited if you also want the stain gone. Hydrogen peroxide at 3 percent, held in contact the same way, will lighten surface staining more effectively than vinegar and is the best of the non-chlorine routes. Beyond that, removal and resealing is the only reliable answer, and on an ingrained bead it is the only answer regardless of what you use.
How long should new sealant last before it goes mouldy?
There is no published figure that means anything, because it depends almost entirely on how quickly the joint dries. A well ventilated bathroom can go five years or more. A windowless shower room with no working fan can spot inside eighteen months. If a new bead blackens within a year, look at the ventilation before you blame the sealant.
Related guides
- Best extractor fans for bathrooms, including how to size one to the room and why the overrun timer matters more than the sticker on the box
- Best silicone sealants for a waterproof seal, what to reseal with once the old bead is out
- Getting rid of black mould in the bathroom, for when it has spread past the sealant onto walls and ceilings
- Best grout removal tools, if the tiled joint needs raking out while the bath is stripped back
- Best shower cleaners, for keeping the soap film off the joint so this does not happen again



0 Comments